What are Custom Roles?
Partoo’s Custom Roles feature enables organizations to create granular permission systems that go beyond traditional user roles. This powerful feature allows you to define precisely what features and data each user can access and modify within your organization. With Custom Roles, you can:- Create tailored user roles with specific permission sets
- Control access to individual features and data fields
- Assign roles to users through the Partoo app or REST API
- Maintain fine-grained security and access control
Quick Navigation
- Breaking Changes - Breaking changes from the legacy system using “Business Fields” and “Sidebar Pages”
- Before Custom Roles - Legacy permission system overview
- Using Custom Roles - New system overview
- Migration Guide - How to migrate your organization from the legacy system of permissions to the new Custom Role system
- REST API Examples - Practical implementation examples
- Best Practices - Security and management recommendations
- Troubleshooting - Common issues and solutions
Breaking Changes
For a list of breaking changes, please refer to the Partoo API Changelog.Before Custom Roles
This section describes how things worked before the release of Custom Roles.Business Fields
Before Custom Roles, “Business Field” permissions were limited and could only be configured for specific user roles:- Business Manager
- Group Manager
- Organization-level:
GET /org/{org_id}/business_fields - Business-level:
GET /business/{business_id}/business_fields

Sidebar Pages
Sidebar Pages represent feature-level permissions that control access to entire application sections. These permissions are broader than Business Fields and determine which features users can access. Available Sidebar Pages:DIFFUSIONBULK_MODIFICATIONPOSTSREVIEW_MANAGEMENTREVIEW_INVITEMESSAGESPRESENCE_ANALYTICSREVIEW_ANALYTICSFEEDBACK_MANAGEMENT
If a user lacks access to a Sidebar Page (e.g.,
REVIEW_MANAGEMENT), they
won’t see the corresponding navigation link in the app sidebar, and cannot
access that feature.GET /user/{user_id}
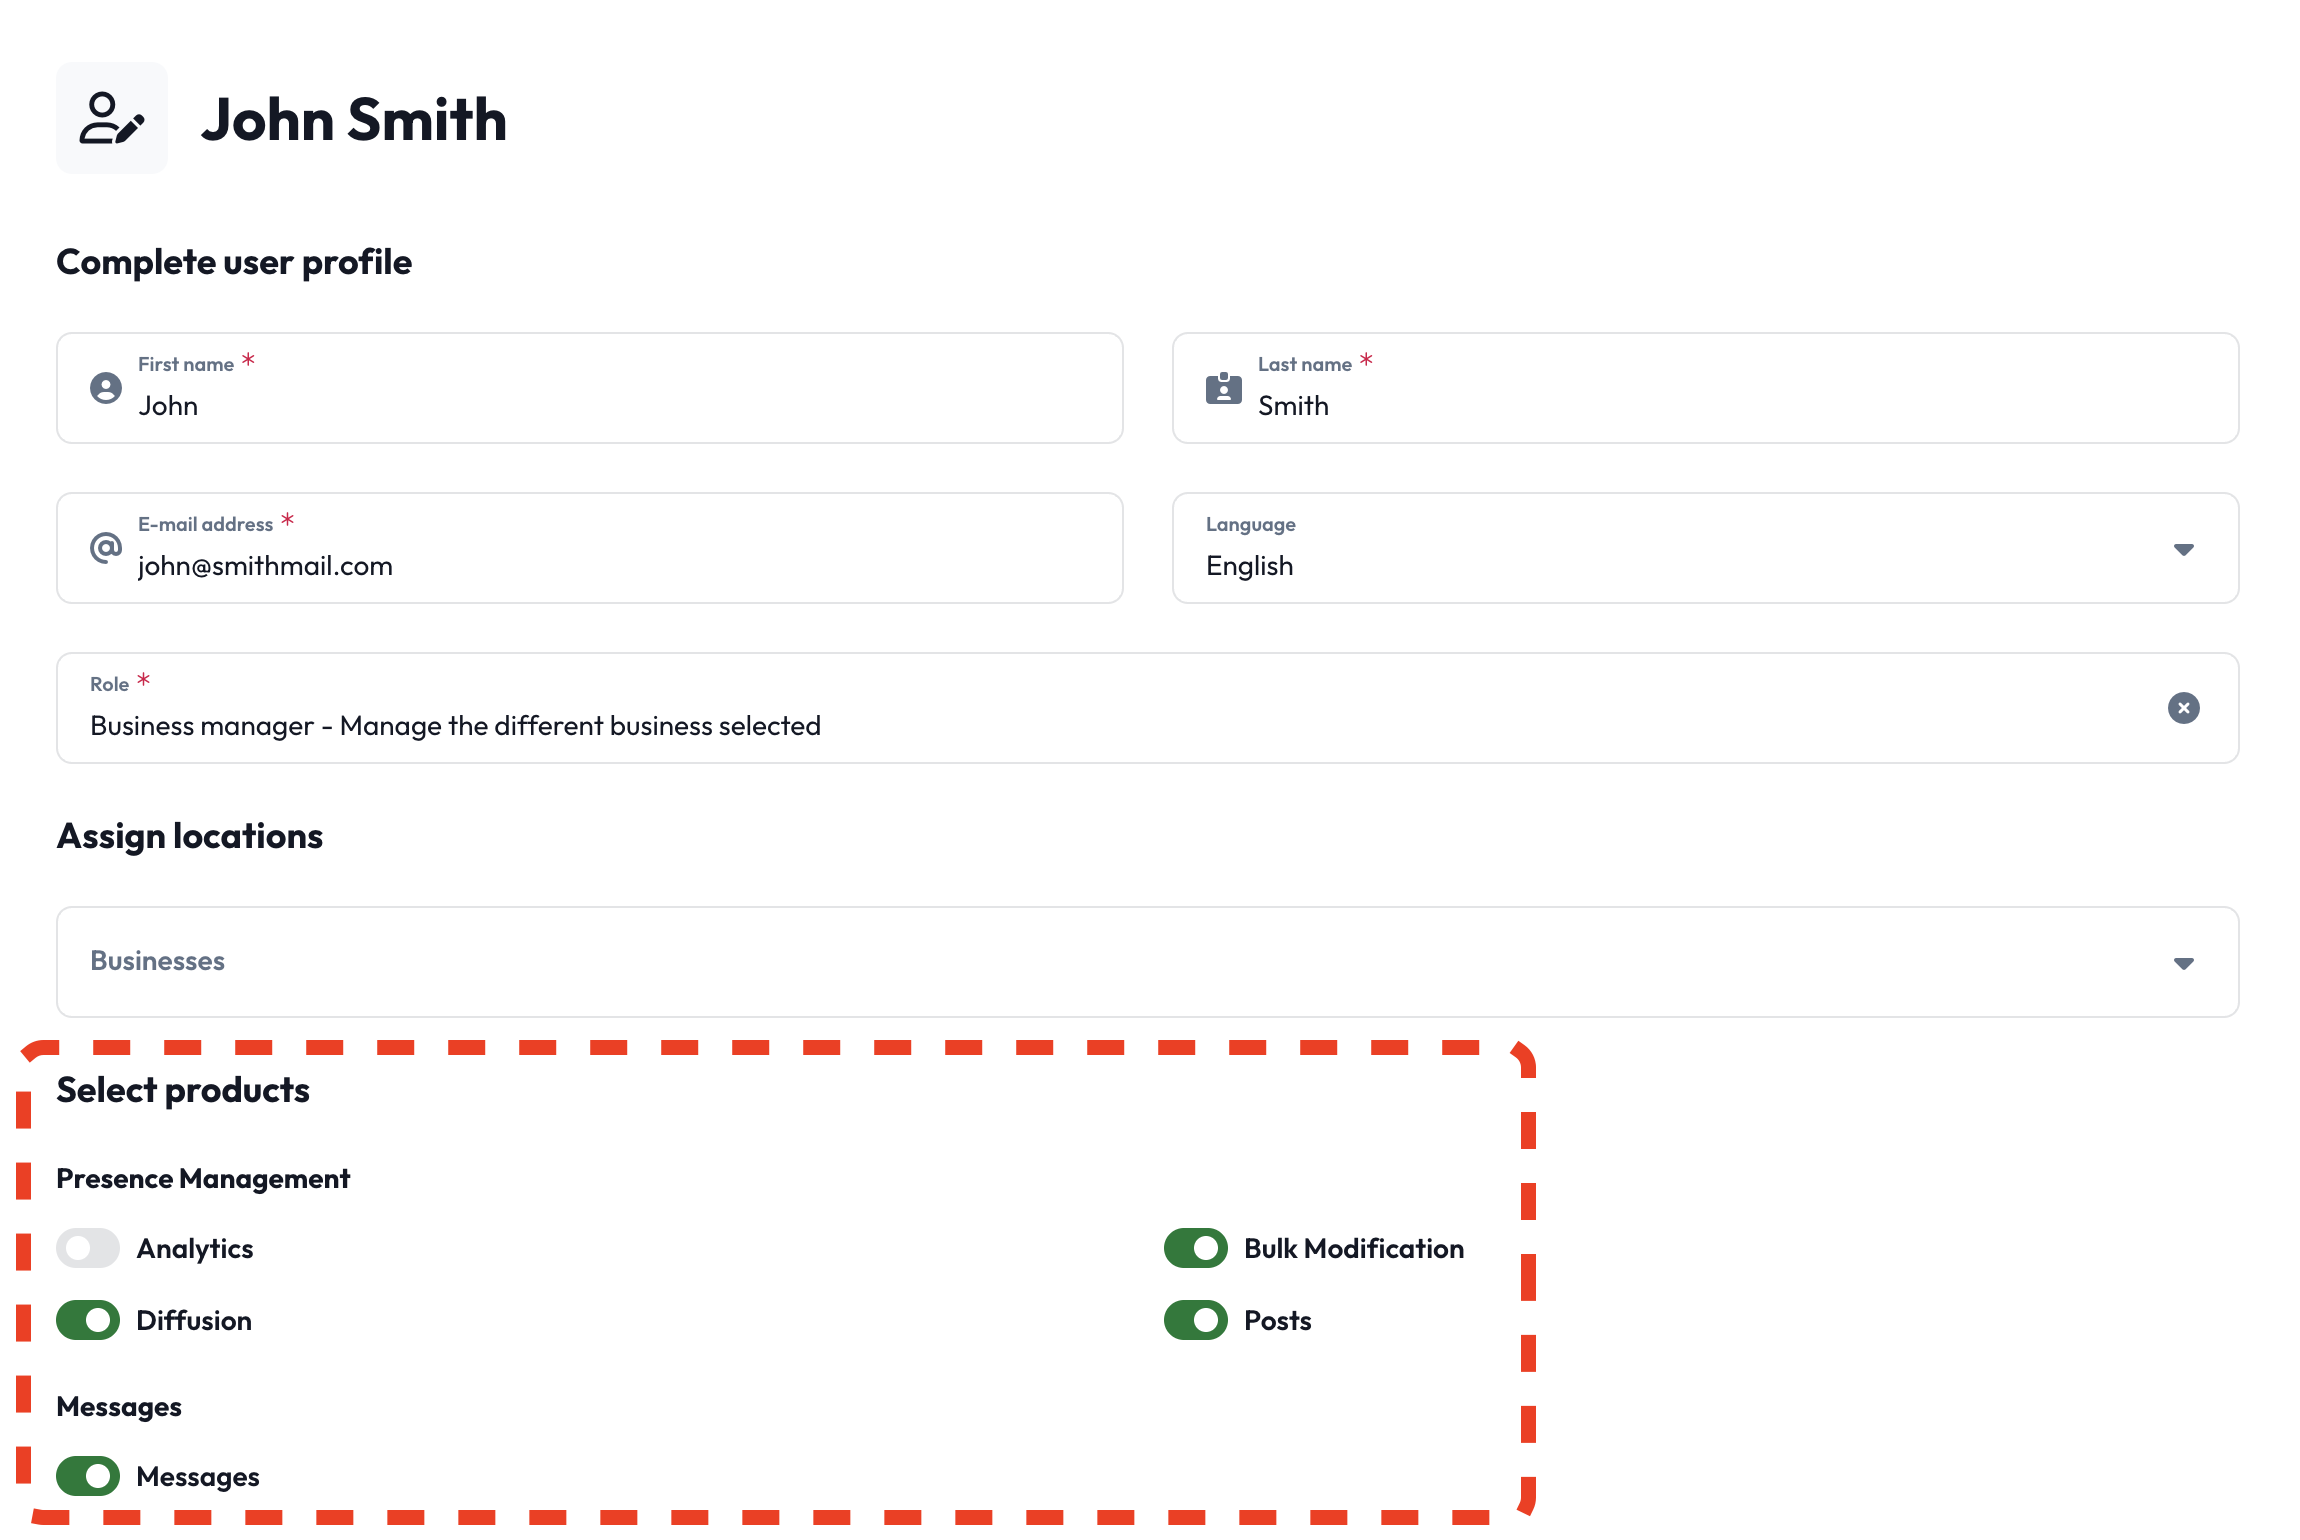
Using the new Custom Roles feature
This section describes how to use the new Custom Roles feature, in order to customize user permissions for your organization. Custom Roles give you a very fine level of control over user permissions, and because of this, we recommend you to initially use the GUI in the Partoo app to set up your new Custom Roles and permissions. The GUI offers you an easier way to visualize and manage the sometimes complex permission structures.Understanding Permissions
Permissions are the building blocks of Custom Roles, identified by unique names likebusiness_edit for editing business data.
Permissions are what give a role its capabilities, and by combining different permissions, you can create roles that fit your organization’s needs. Permissions can be anything from allowing you to edit the opening hours of businesses, to managing reviews or accessing analytics data.
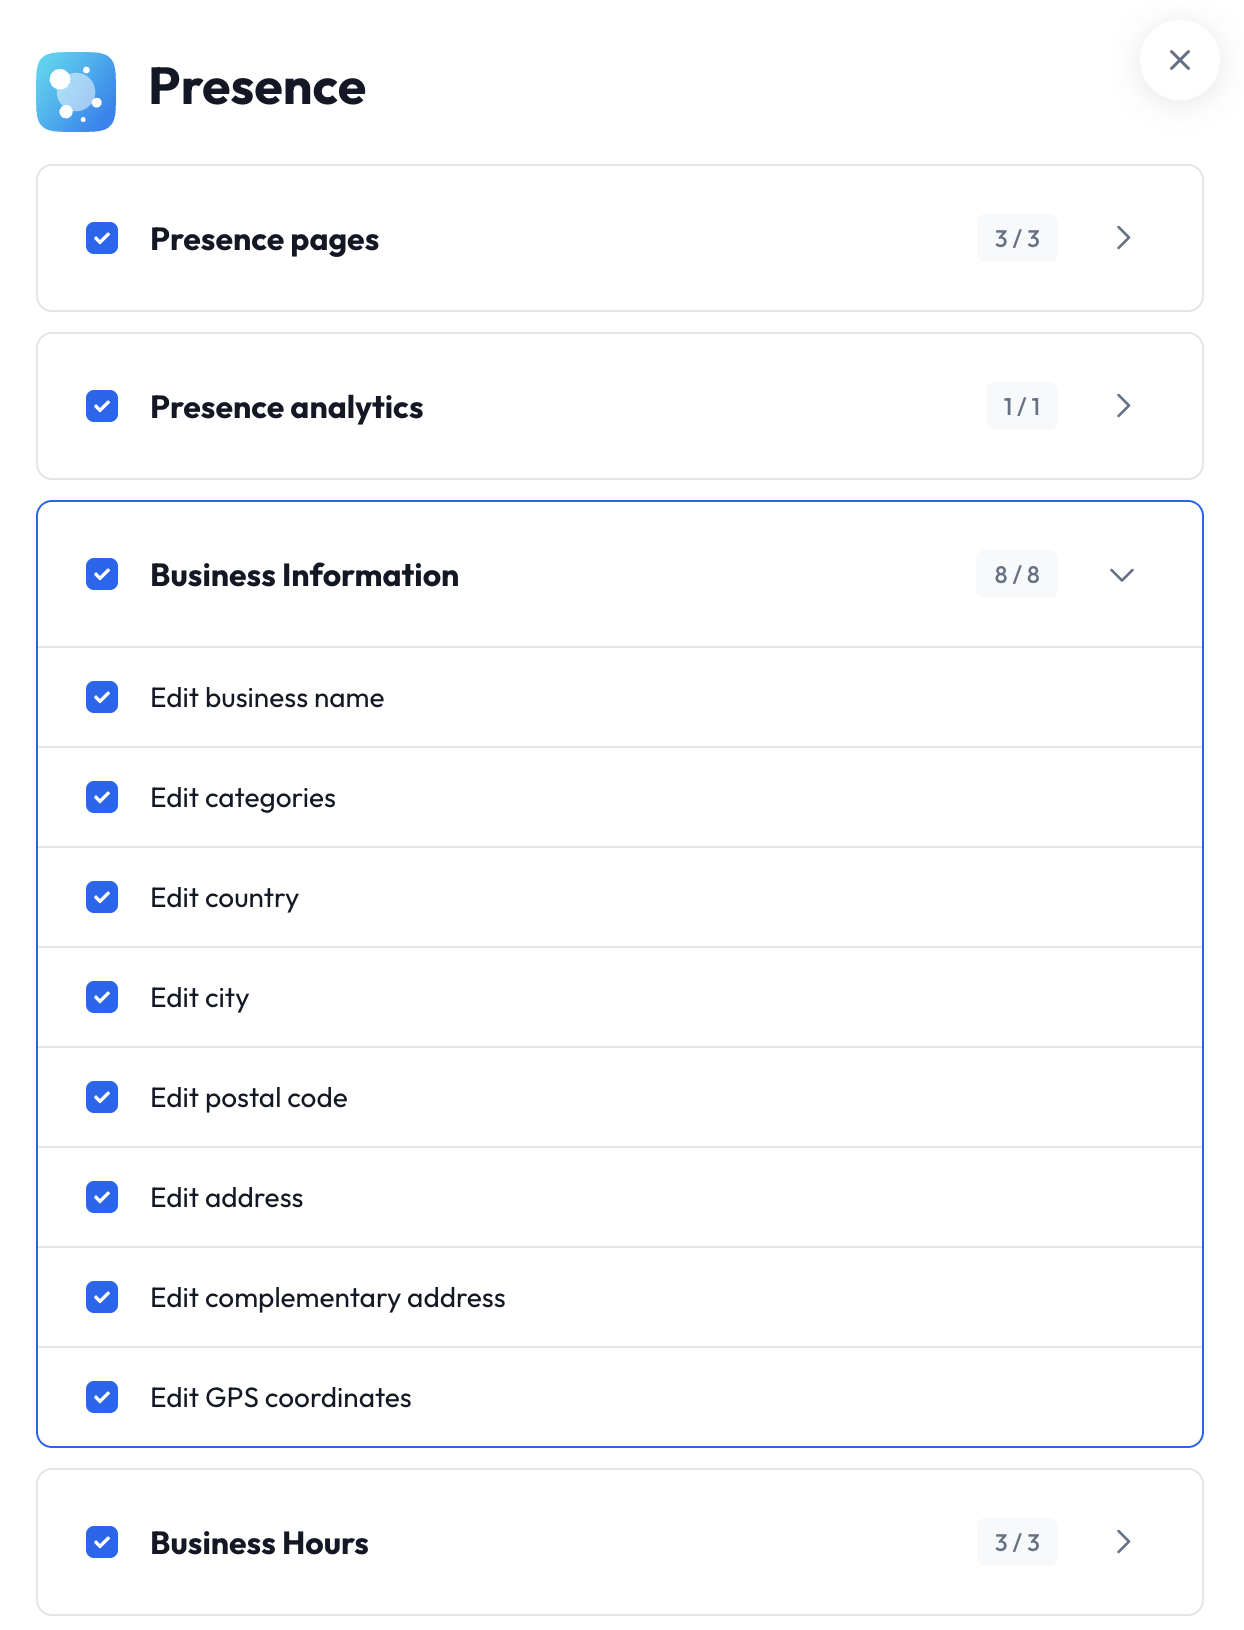
name: Unique identifier for the permission (e.g.,review_reply_positive_reviews)disabled_for_roles: Array of user roles that cannot access this permissiondepends_on: Specifies if this permission requires another permission to function- Hierarchical Organization: Permissions are grouped into logical
sectionsandsubsectionsfor easier navigation
/permissions endpoint to discover all permissions available to your organization.
Example Response:
Working with Custom Roles
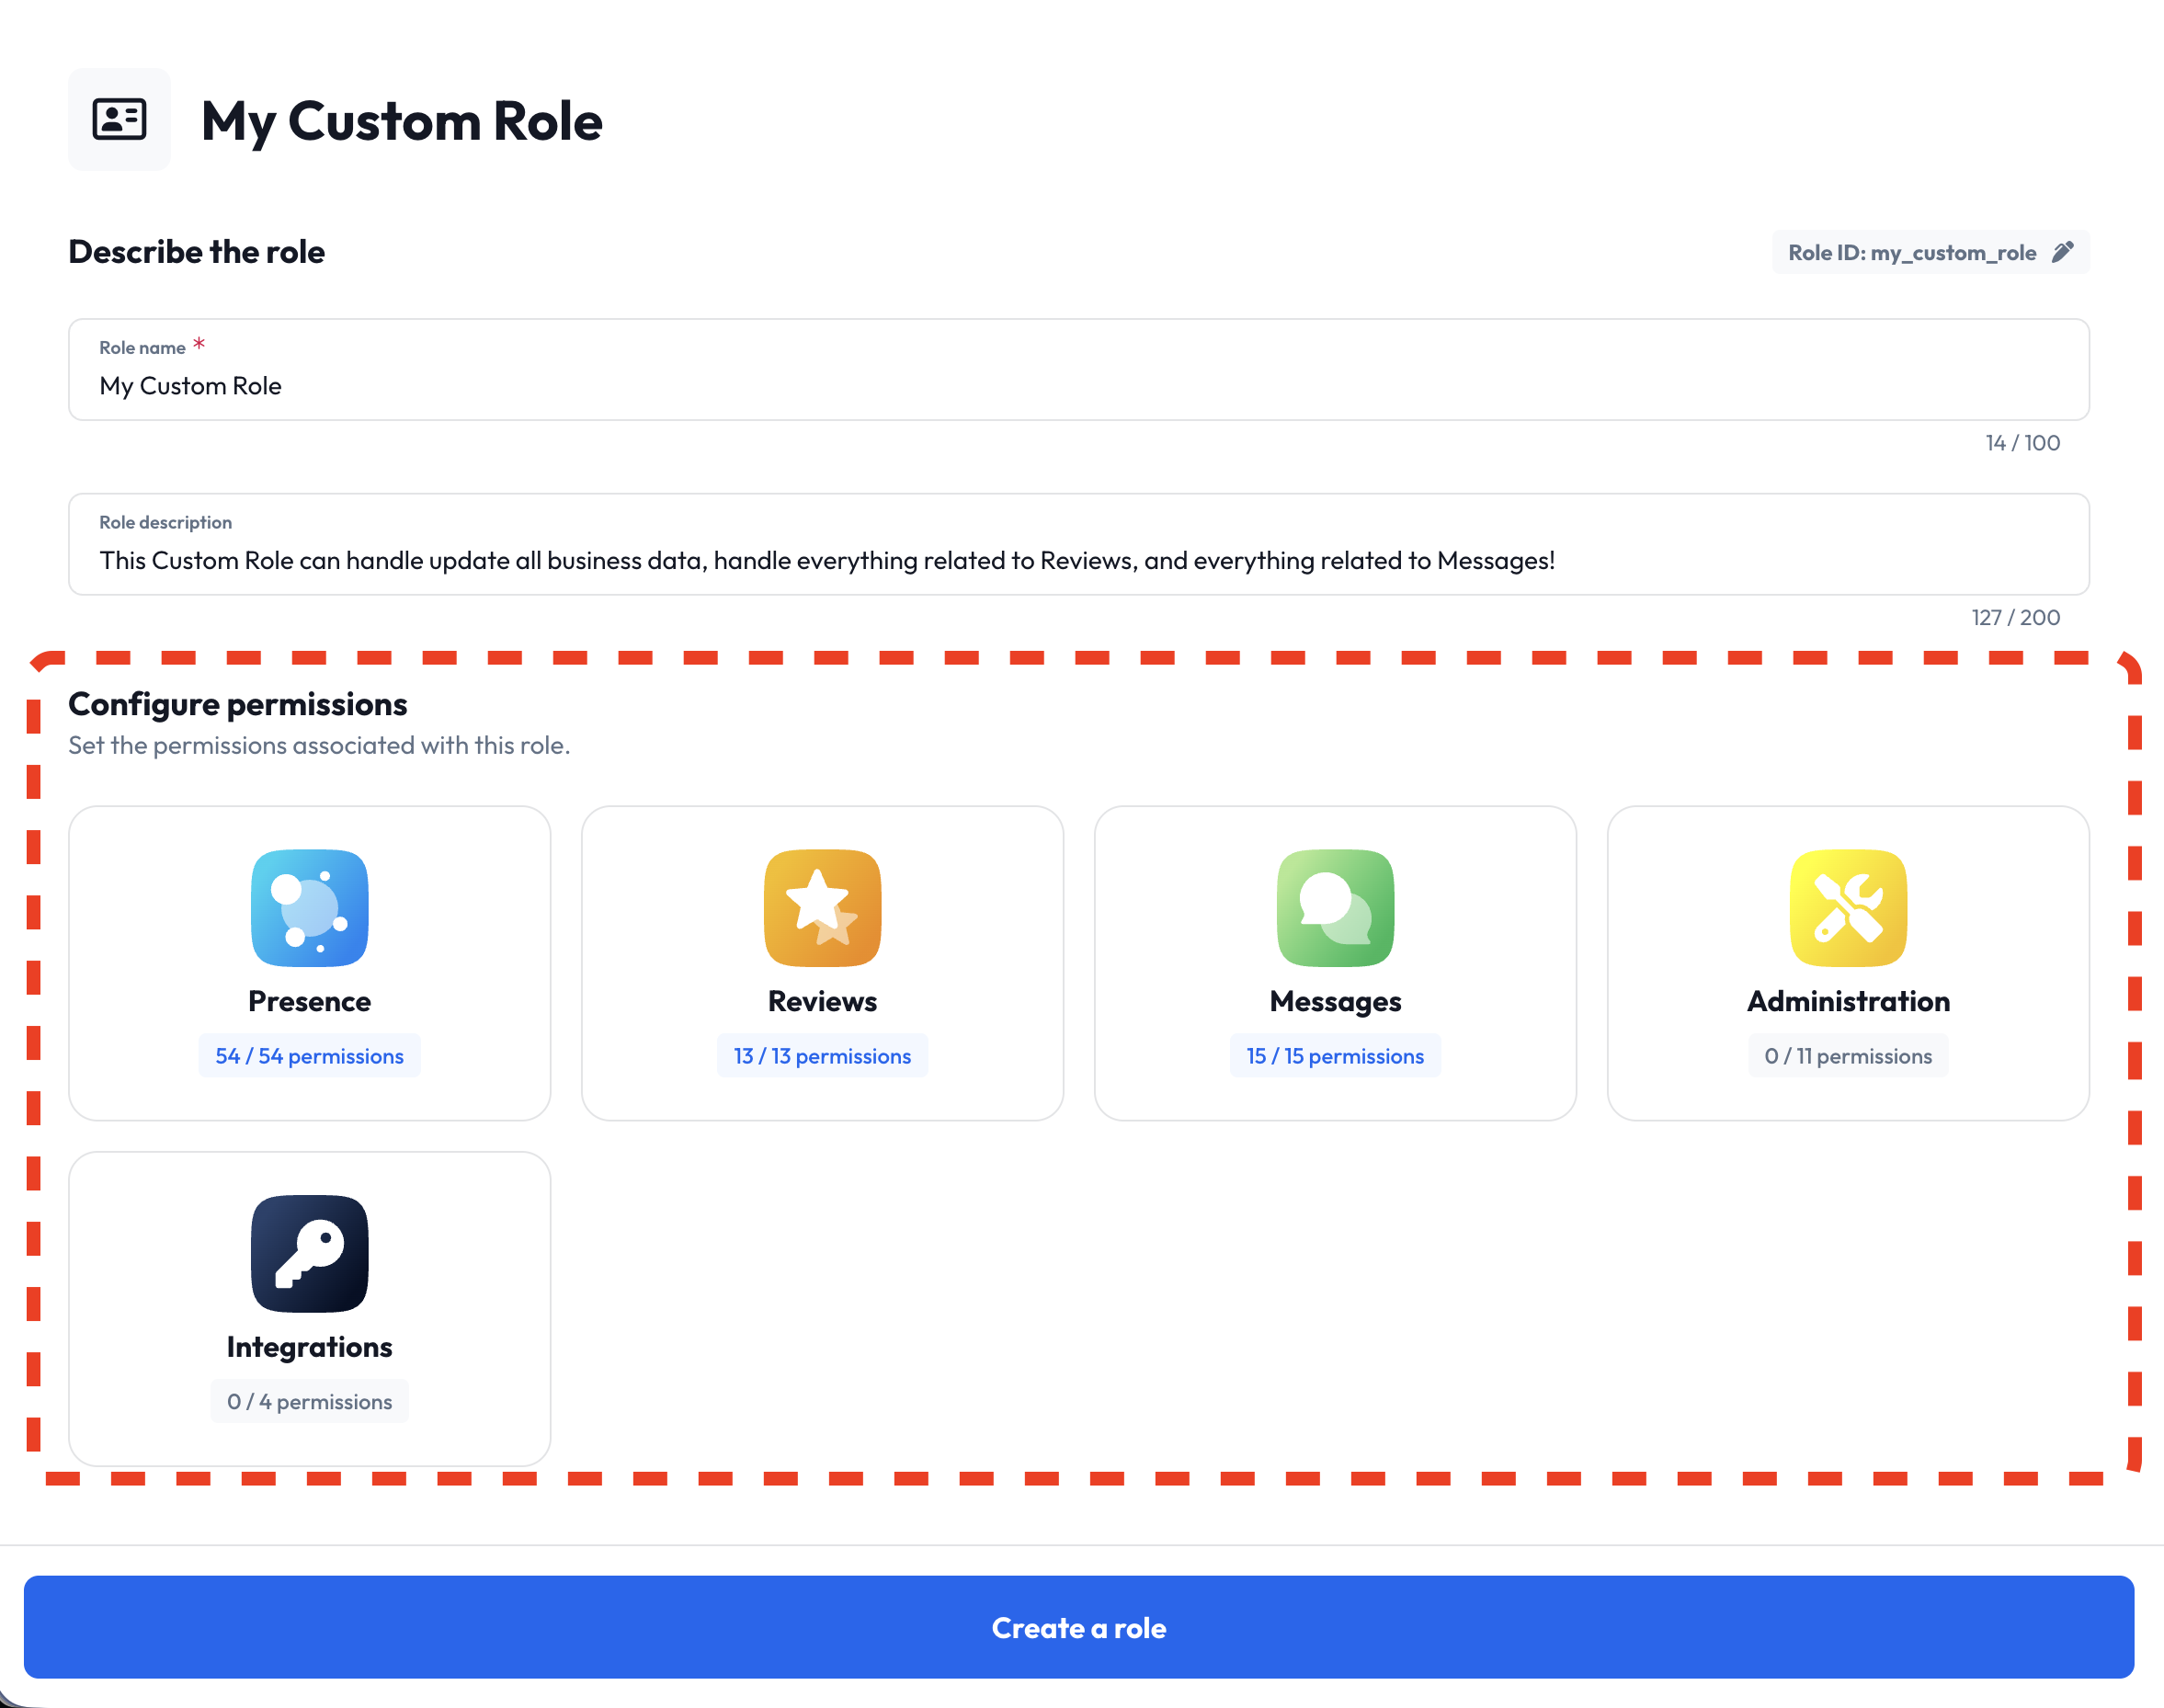
Custom Role Structure
Every Custom Role consists of three essential components:name— Human-readable display name for the roleapi_id— Unique identifier used in API operations- ⚠️ This ID is used for retrieving, updating, and deleting roles. Changes can break integrations.
permissions— Array of permission identifiers granted by this role
description— Detailed explanation of the role’s purpose and scope
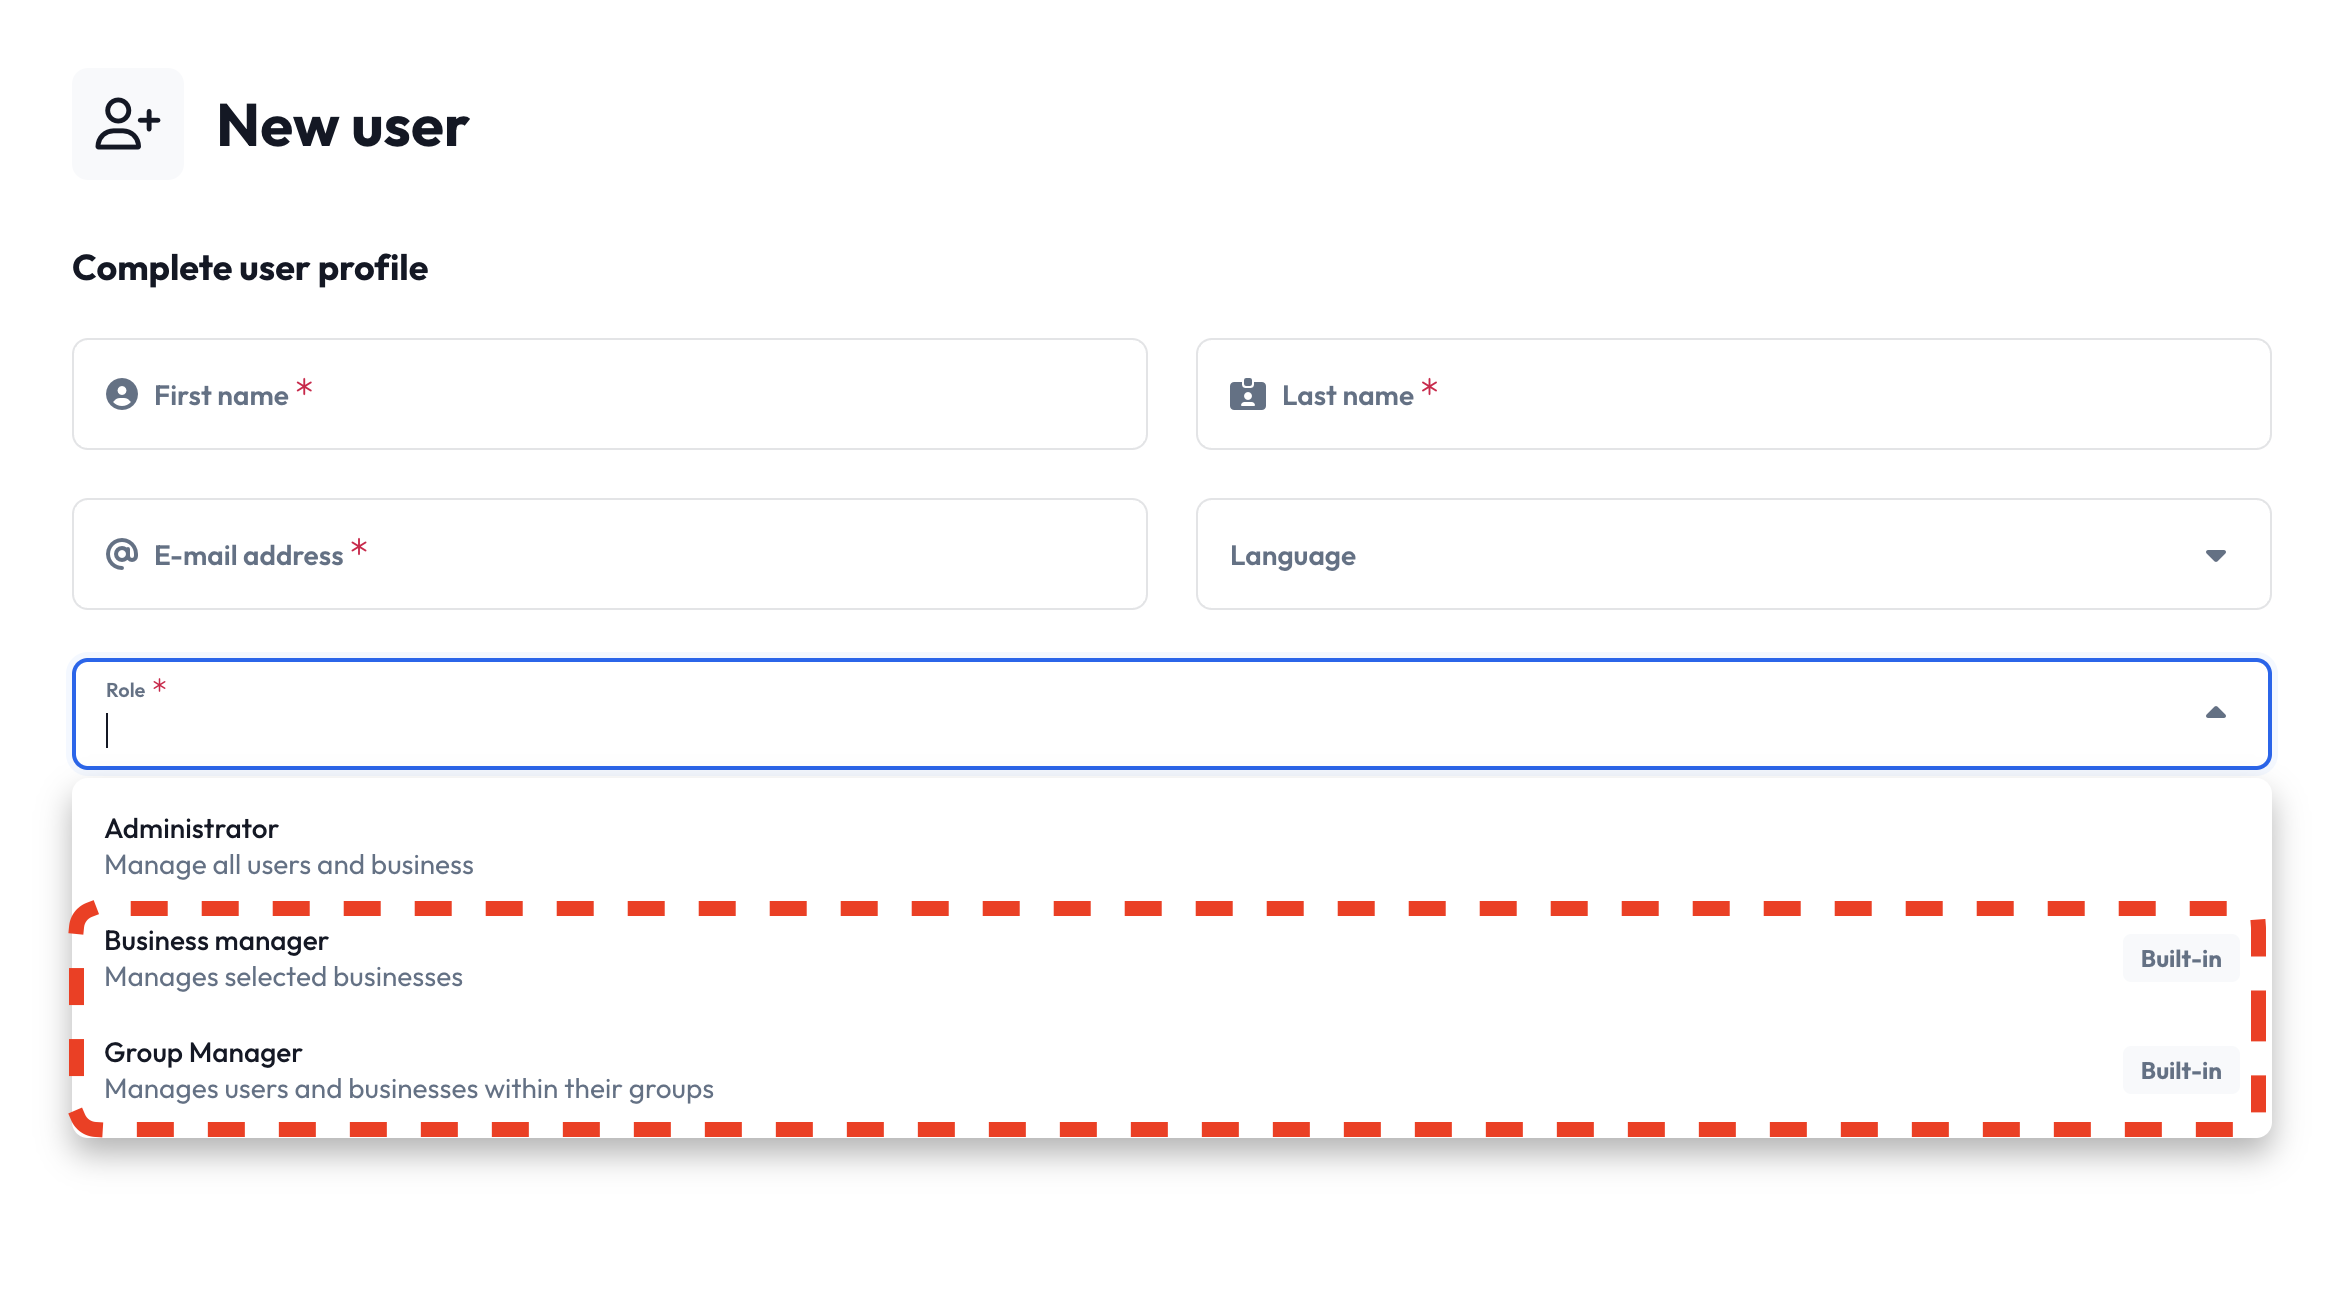
Built-in Custom Roles
Every organization has access to two pre-configured Custom Roles with special characteristics: Restrictions on Built-in Roles:- ✅ Permissions: Can be updated
- ❌ Name, API ID, Description: Cannot be modified
- ❌ Deletion: Cannot be deleted (use “reset” to restore defaults)
is_builtin: trueorg_id: null
/org/{org_id}/custom_role/{api_id} endpoint with the desired permission changes, and the built-in role will be updated for your organization. The built-in role can now be identified by having the build_in property set to true, and org_id set to the ID of your organization.
Assigning Custom Roles to Users
To assign a Custom Role to a user, update the user’scustom_role field with the desired role’s api_id. Of course, you can also assign a Custom Role upon user creation.
Once a user is assigned a Custom Role, they inherit all permissions defined in that role.
Endpoint: POST /user/{user_id} and/or POST /user
Role Lifecycle Management
Custom Roles support full CRUD operations through the REST API:- Create: POST
/org/{org_id}/custom_role - Read:
- GET
/org/{org_id}/custom_role(list) - GET
/org/{org_id}/custom_role/{api_id}(single)
- GET
- Update: POST
/org/{org_id}/custom_role/{api_id} - Delete: DELETE
/org/{org_id}/custom_role/{api_id} - Assigning Custom Roles to Users: POST
/user/{user_id}and/or POST/user
Migration Guide
This section covers the migration from the legacy Business Fields and Sidebar Pages system to Custom Roles. Organizations can check if they’re eligible to migrate and manually trigger the switch when ready using the migration endpoints below. Before making the switch, we strongly recommend reading this entire guide to understand the implications and changes that Custom Roles will bring to your organization. The migration is non-destructive - all legacy permission data is preserved, allowing you to switch back to the legacy system if needed. However, after the deprecation period ends (6 months), legacy data will be permanently deleted and organizations will be automatically migrated to Custom Roles.New Migration Endpoints
To support the migration from the legacy permission system to Custom Roles, two new endpoints have been added:-
GET
/org/{org_id}/switch_to_custom_roles- Get the current migration status for your organization. Returns information about whether your organization has switched to Custom Roles and whether you’re allowed to make the switch. -
POST
/org/{org_id}/switch_to_custom_roles- Update your organization’s Custom Roles migration status. This endpoint allows you to enable or disable the Custom Roles feature for your organization (provided you have permission to make this change).
Automatic Update of Built-in Roles
When an organization switches to the Custom Roles system, the built-in roles (Business Manager and Group Manager) are automatically updated to match your current Business Field permissions. This ensures that users assigned to these roles retain their existing capabilities without any manual intervention. For example, if you have restricted the Business Manager role from editing certain business fields, those restrictions will be reflected in the updated built-in Custom Role.REST API Examples
Below are two concrete examples that demonstrate how to create custom roles with specific permission sets.Example A: Business Editor (restricted sensitive fields)
In this example, we’ll create a “Business Editor” role with comprehensive business editing permissions, while restricting access to sensitive fields. Excluded Sensitive Fields:business_edit_status— Controls business open/closed statusbusiness_edit_siret— French business tax identification numberbusiness_edit_code— Business identifier used in integrations
Discover Available Permissions
Call GET
/permissions to
retrieve all available permissions for your organization.Create the Custom Role
Use POST
/org/{org_id}/custom_role with the selected permissions:Excluded Permissions:
business_edit_status, business_edit_siret, business_edit_code are intentionally omitted, preventing users from editing these sensitive fields.Assign the Role to Users
Once created, assign the “Business Editor” role to users by updating their ✅ Result: The user inherits all permissions defined in the “Business Editor” role.
custom_role field.Endpoint: POST /user/{user_id}Request Body:Example B: Review Manager (all review-related permissions)
In this example, we’ll create a comprehensive “Review Manager” role with full access to review-related functionality. Role Capabilities:- View and filter reviews
- Download review data and analytics
- Manage review states and flags
- Create and assign tags
- Reply to reviews (with templates and AI suggestions)
- Access review booster features
- Configure automated settings
Retrieve Available Permissions
Use GET
/permissions and
select all review_* permissions for comprehensive coverage.Create the Review Manager Role
Use POST
/org/{org_id}/custom_role to create the role:Assign the Role to Users
Assign the “Review Manager” role by updating the user’s ✅ Result: The user gains comprehensive review management capabilities.
custom_role field.Endpoint: POST /user/{user_id}Request Body:Best Practices
Role Design Principles
- Principle of Least Privilege: Grant only the minimum permissions necessary for users to perform their tasks
- Role Naming: Use clear, descriptive names that indicate the role’s purpose and scope
- API ID Stability: Choose stable
api_idvalues that won’t need changes - Documentation: Maintain clear descriptions for each custom role
Troubleshooting
Common Issues
- Permission Dependencies: Ensure all required dependent permissions are included
- API ID Conflicts: Choose unique
api_idvalues within your organization - Invalid Permissions: Verify permissions exist using the permissions endpoint before assignment
- Built-in Role Modifications: Remember that built-in roles have limited editability